


Looking to build or repair 18650 lithium battery packs? A spot welder is the essential tool you need. Whether you’re working on DIY power banks, e-bike batteries, or power tool upgrades, this guide will walk you through everything you need to know about spot welding. From understanding the basics to mastering the techniques, safety tips, and choosing the best spot welder, this article is your go-to resource for creating reliable and efficient battery packs.
What Is a Spot Welder for 18650 Lithium Batteries?
A spot welder is a specialized tool designed to join metal surfaces by applying concentrated heat at specific points. For 18650 lithium batteries, it creates strong, low-resistance connections between battery cells and nickel strips without damaging the sensitive chemistry inside.
Unlike soldering (which risks overheating cells), spot welding delivers quick, precise bursts of current to fuse metals. This makes it the safest and most efficient method for building or repairing battery packs in:
- DIY power banks
- E-bike/e-scooter batteries
- Solar energy storage systems
- Power tool battery rebuilds
Key features of a quality 18650 spot welder include adjustable current/pulse timing, safety shutoffs, and compatibility with thin nickel strips (0.1–0.15mm).
How to Assemble a Custom 18650 Battery Pack Using a Spot Welder
Step-by-Step Guide:
-
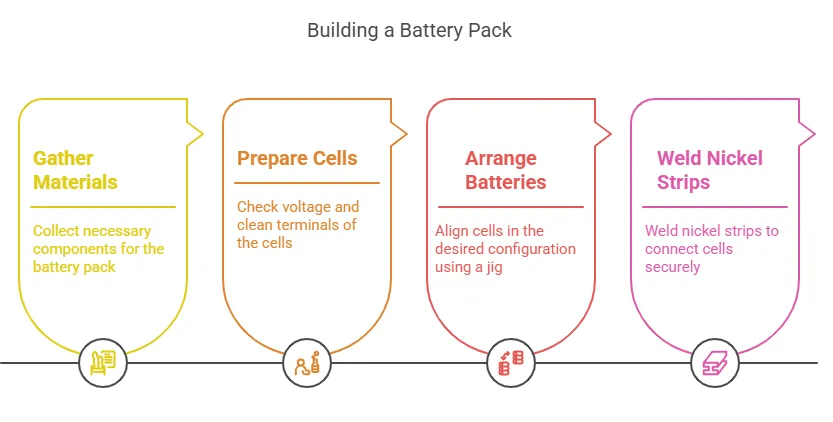
Gather Materials:
- 18650 cells (same model/capacity)
- Nickel strip (pure nickel recommended)
- Spot welder (e.g., Kweld, Malectrics)
- Battery holder or jig
-
Prepare Cells:
- Check voltage (must be within 0.1V difference)
- Clean terminals with isopropyl alcohol
-
Arrange Batteries:
- Use a jig to align cells in series/parallel configuration
- Insulate exposed contacts with fish paper
-
Weld Nickel Strips:
- Set welder to 3–5 ms pulse time (test on scrap nickel first)
- Press electrodes firmly onto strip + cell terminal
- Weld 2–3 spots per connection
-
Add Protection Circuit (BMS):
- Solder BMS wires to the first/last cell
Pro Tip: Always wear safety glasses and work in a well-ventilated area to avoid metal fume exposure.
How Does a Spot Welder Work for 18650 Cells?
Spot welders for 18650s use high-current, short-duration pulses (1–10ms) to melt nickel strips onto battery terminals. Here’s the science:
- Electrodes clamp the nickel strip against the cell’s steel terminal.
- Current (100–1000A) flows through the contact point, generating heat via resistance.
- Metal Fusion: The nickel melts locally, bonding to the terminal without overheating the cell.
Critical Settings:
- Pulse Time: Longer pulses risk cell damage (≥8ms may degrade lithium-ion chemistry).
- Electrode Pressure: Too low causes weak welds; too high may dent cells.
Using Spot Welders for Power Tool Battery Repairs
Reviving dead DeWalt/Makita batteries? Spot welding beats soldering because:
✔ No heat damage to cells (soldering irons exceed 200°C—unsafe for Li-ion).
✔ Stronger joints that withstand vibration (critical for power tools).
Common Repairs:
- Replacing puffed/weak cells in a pack
- Fixing broken nickel-strip connections
- Upgrading capacity with higher-quality 18650s
Warning: Only reuse cells with >80% original capacity (test with a capacity checker).
Safety Requirements and Ventilation Tips
Hazards of Spot Welding 18650s:
- Toxic fumes from melting nickel/steel.
- Fire risk if cells are punctured or short-circuited.
Safety Checklist:
- Ventilation: Use a fume extractor or work near an open window.
- PPE: Wear gloves + goggles (metal splatter can injure eyes).
- Fire Precautions: Keep a Class D fire extinguisher nearby.
- Cell Handling: Never weld damaged/leaking cells.
How to Test Weld Strength on 18650 Batteries
Why Test Weld Strength?
Weak welds cause high resistance, overheating, or pack failure. Testing ensures reliability for high-drain applications like e-bikes or power tools.
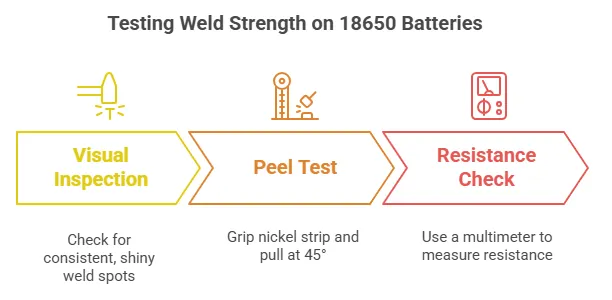
Step-by-Step Test Method:
-
Visual Inspection:
- Check for consistent, shiny weld spots (dull gray = cold weld).
- No visible gaps between nickel strip and cell.
-
Peel Test:
- Grip nickel strip with pliers and pull at 45°.
- A good weld tears the nickel (not the strip peeling off cleanly).
-
Resistance Check:
- Use a multimeter in milliohm mode.
- Probe across weld joint; <10mΩ is ideal for most applications.
Pro Tip: Test 1–2 sample welds before assembling a full pack.
Common Mistakes When Spot Welding 18650 Batteries
Avoid These Errors for Safe, Durable Packs:
-
Incorrect Settings:
- Too low current → Weak, flaky welds.
- Too long pulse → Burns holes in strips or damages cell seals.
-
Dirty Electrodes/Cells:
- Oxide buildup on terminals increases resistance.
- Fix: Clean with isopropyl alcohol or fine sandpaper (lightly).
-
Wrong Nickel Strip:
- Pure nickel (Ni200) is best; nickel-plated steel causes high resistance.
- Thickness 0.1–0.15mm balances flexibility and current capacity.
-
Poor Alignment:
- Misaligned electrodes create uneven pressure → Inconsistent welds.
Critical Safety Mistake: Welding fully charged cells (3.6–4.2V). Always discharge to <3.0V to reduce arc/spark risks.
How to Clean Spot Welder Electrodes
Dirty electrodes cause weak welds and energy loss. Here’s how to maintain them:
Materials Needed:
- Fine-grit sandpaper (400+ grit)
- Isopropyl alcohol (>90%)
- Brass wire brush
Cleaning Steps:
- Power Off the welder and unplug it.
- Sand Electrodes: Lightly polish tips with sandpaper until shiny.
- Alcohol Wipe: Remove debris with a lint-free cloth dipped in alcohol.
- Re-shape Tips: File flattened electrodes to a sharp-ish point for better current focus.
Frequency: Clean every 20–30 welds or if you notice:
- Increased sparking
- Inconsistent weld marks
- Strip sticking to electrodes
Best Spot Welders for 18650 Batteries (2025 Guide)
Top Picks for DIY and Professional Use:
-
Kweld (Professional Grade)
- Why? 1,000A peak, ultra-precise pulse control (0.1ms steps).
- Best for: High-volume pack builders.
-
Malectrics DIY (Budget-Friendly)
- Why? Open-source firmware, adjustable up to 500A.
- Best for: Hobbyists repairing power tool batteries.
-
Sunkko 737G (Portable Option)
- Why? Battery-powered, works in field repairs.
- Caution: Limited to 0.1mm nickel strips.
Key 2025 Trends:
- Pulse shaping tech for thinner materials (e.g., 0.08mm nickel).
- AI-assisted weld quality detection (e.g., via camera systems).
This article provides a detailed exploration of spot welding for 18650 lithium batteries. It explains why a spot welder is crucial for safely and efficiently connecting battery cells, with a focus on key features like adjustable current and pulse timing. The guide includes step-by-step instructions for assembling custom battery packs, repairing power tool batteries, and testing weld strength. It also highlights common mistakes to avoid and offers recommendations for the best spot welders in 2025. By following this comprehensive guide, you’ll be able to build and maintain high-quality 18650 battery packs with confidence.


